A media wall installation is a stylish and functional addition to any modern home or commercial space. It enhances entertainment experiences, optimizes storage, and creates a sleek, contemporary aesthetic. Whether you are looking to install a simple TV unit or a fully integrated multimedia wall with LED lighting, speakers, and smart home connectivity, understanding the process from concept to completion is essential. This guide will walk you through every step of a media wall installation, helping you achieve the perfect setup.
Understanding Media Walls And Their Benefits
Media walls are custom-designed installations that integrate audiovisual components seamlessly into a dedicated space. They serve as a focal point in living rooms, home theaters, and office conference rooms. The key benefits of a media wall installation include:
- Enhanced Aesthetics: A media wall creates a clean, clutter-free look by concealing cables and hardware.
- Space Optimization: Custom shelving and storage solutions help maximize space.
- Improved Entertainment Experience: Integrated sound systems and smart lighting elevate viewing pleasure.
- Home Value Addition: A well-designed media wall increases the aesthetic and resale value of a home.
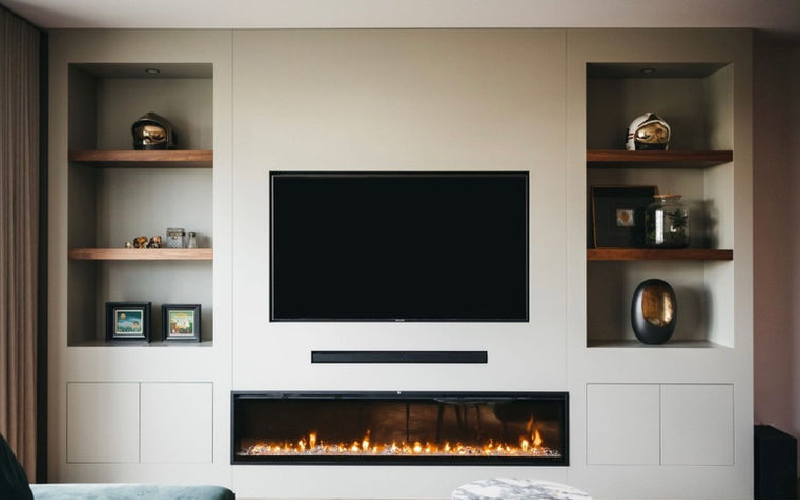
Planning And Designing Your Media Wall
Before starting a media wall installation, careful planning is required. Consider the following aspects:
Choosing The Right Location
- Identify a wall with sufficient space and minimal obstructions.
- Consider viewing angles and natural light exposure.
- Ensure access to electrical outlets and internet connections.
Determining Your Media Wall Components
A media wall can be customized with various components, including:
- TV or Projector Screen: Choose a screen size that complements your space.
- Sound System: Built-in speakers or a surround sound system enhance audio quality.
- Storage Solutions: Cabinets, floating shelves, or hidden compartments keep accessories organized.
- Smart Home Integration: Voice-controlled lighting and automation add convenience.
Selecting Materials And Finishes
- Wood and MDF Panels: Offer durability and a modern look.
- Glass and Metal Accents: Enhance a sleek, industrial aesthetic.
- LED Lighting: Adds ambiance and highlights features.
Preparing For Installation
Once the design is finalized, the next step is preparing the space.
Gathering Tools And Materials
Common tools required for media wall installation include:
- Stud finder
- Drill and screwdriver
- Measuring tape and level
- Wall anchors and brackets
- Cable management solutions
Setting Up Electrical And Cable Management
- Ensure power outlets and internet connections are strategically placed.
- Use cable conduits or in-wall cable routing to maintain a neat appearance.
- Install surge protectors for electronic safety.
Building The Media Wall Structure
The installation process varies depending on the design complexity but generally follows these steps:
Framing The Structure
- Construct a frame using wood or metal studs.
- Secure the frame to the wall and floor for stability.
- Allow adequate ventilation space for heat dissipation from electronic devices.
Mounting The Tv And Accessories
- Use a sturdy TV bracket suitable for the screen size and weight.
- Position speakers and soundbars at optimal heights.
- Install shelves and storage compartments as per the design layout.
Adding Decorative Elements
- Apply paint or wallpaper to complement the room’s theme.
- Install LED strip lighting behind the TV or shelves for a dynamic effect.
- Incorporate artwork, plants, or decorative objects for a personalized touch.
Testing And Final Adjustments
Once the structure is complete, the final phase ensures everything functions correctly.
Checking Connectivity And Functionality
- Test all electronic components, including the TV, speakers, and lighting.
- Ensure remote controls and smart home integrations work smoothly.
- Adjust screen and speaker positioning for optimal viewing and sound quality.
Hiding Cables And Finalizing Setup
- Conceal any remaining cables for a seamless look.
- Organize remote controls and accessories in designated storage spaces.
- Perform a final aesthetic inspection to ensure alignment and finishing details are perfect.
Maintenance And Upgrades
A well-maintained media wall ensures longevity and peak performance.
Regular Cleaning And Care
- Dust screens and surfaces frequently to prevent buildup.
- Check cable connections periodically to ensure they remain secure.
- Clean speaker grilles and vents to maintain sound clarity.
Upgrading Components Over Time
- Replace outdated equipment with the latest technology.
- Upgrade storage solutions to accommodate new devices.
- Adjust lighting features to match evolving décor preferences.
Conclusion
A media wall installation is a worthwhile investment that enhances entertainment, aesthetics, and functionality in any space. By carefully planning the design, choosing quality materials, and following a structured installation process, you can create a media wall that meets your needs and complements your lifestyle. With regular maintenance and occasional upgrades, your media wall will remain a stylish and efficient focal point for years to come.
Resource Url:
https://en.wikipedia.org/wiki/Video_wall
https://www.devin-furniture.co.uk/mediawalls